Introduction
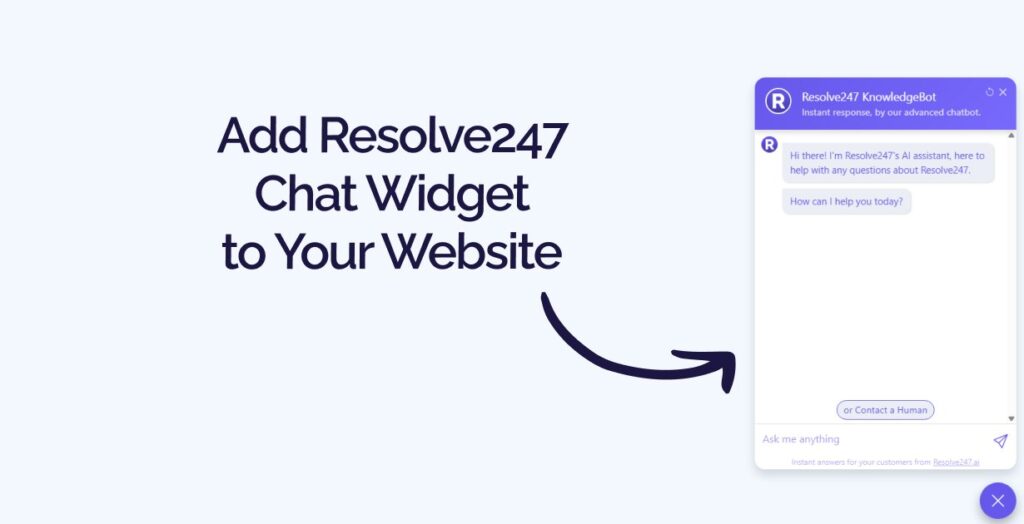
This is the install guide for adding the standalone Resolve247 chat widget to any website where you can paste a snippet of HTML/JavaScript. The steps are the same wherever you are — get your snippet, find your site’s HTML (or its “custom code” equivalent), and paste it in before the closing </body> tag.
Using HubSpot or Crisp? If you’d rather have Resolve247 work inside your HubSpot/Crisp chat widget, you don’t need to install a separate widget – follow the integration-specific guide instead: Connect HubSpot to Resolve247 or Connect Crisp to Resolve247. The full list of supported integrations is on the integrations page.
On WordPress? We have a dedicated walkthrough that uses a free WordPress plugin instead of editing template files: How to add Resolve247 to a WordPress site.
Trying to decide between Resolve247 and other AI options? This guide assumes you’ve already chosen Resolve247. If you’re still weighing up the options, start here: How to add an AI chatbot to your website: 8 ways compared.
What you’ll do
- Copy a one-line snippet from your Resolve247 dashboard.
- Find the right place to paste it on your site (instructions for the common scenarios below).
- Paste it just before
</body>, save, and reload your site.
That’s it. The widget loads asynchronously, so it won’t slow your page down, and you only need to install it once for the chatbot to appear on every page.
If any of the steps below don’t match your setup, we’re happy to install it for you — email us at [email protected] or book a call and we’ll do it together.
Step 1: Get your snippet
- Log in to your Resolve247 dashboard.
- Open Settings.
- Under AIChatbot Options, scroll down to Embedding your Resolve247 chat widget.
- Click Copy Code.
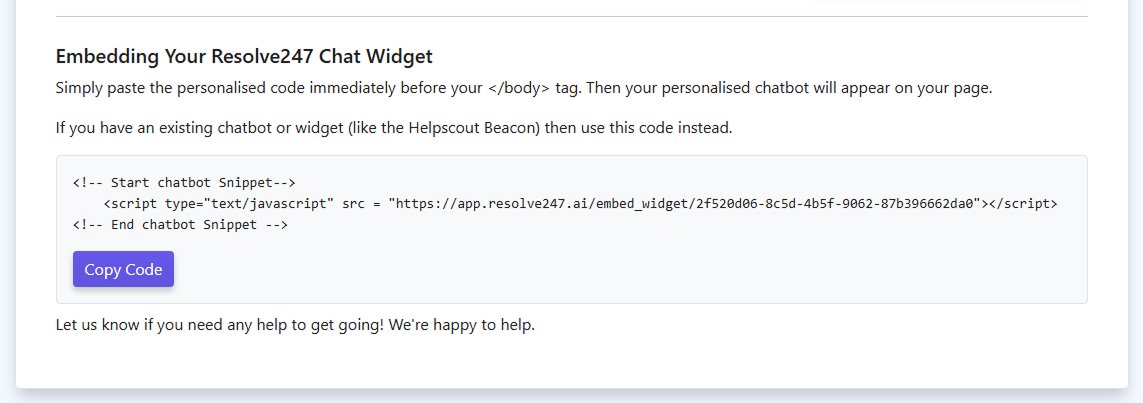
The snippet looks like this (yours will have your own unique key):
<!-- Start chatbot Snippet-->
    <script type="text/javascript" src = "https://app.resolve247.ai/embed_widget/[your-unique-key]"></script>
<!-- End chatbot Snippet -->
Keep this on your clipboard. You’ll paste it in Step 3.
Step 2: Find where to paste it
The snippet needs to go inside your site’s HTML, ideally just before the closing </body> tag. How you reach that HTML depends on how your site is built. Here are the most common scenarios.
If you have direct access to the HTML files
If you (or your developer) edit .html files directly — for example, a static site, a custom-coded site, or a site hosted on something like Netlify, Vercel, GitHub Pages, or your own server:
- Open the template that defines your site’s footer or main layout (often
index.html,layout.html,footer.html, or a similarly named file). - Look for the
</body>tag near the end. - You’ll paste the snippet on the line just above it in Step 3.
If your site has multiple pages built from a single template (a layout file, header/footer include, or component), you only need to add the snippet once in that shared template.
If you’re on a hosted website builder
Most website builders give you a “custom code” or “code injection” area where you can paste third-party scripts without touching theme files. Here’s where to find it on the most common platforms:
- Squarespace — Settings → Advanced → Code Injection → paste into the Footer box.
- Webflow — Project Settings → Custom Code → paste into the Footer Code box. (For a single page only, use Page Settings → Custom Code → Before
</body>Tag.) - Shopify — Online Store → Themes → Edit code → open
theme.liquid→ paste just before</body>. (Or, on newer themes, use App embeds if Resolve247 is in the Shopify App Store for your theme.) - Ghost — Settings → Code injection → paste into Site Footer.
- Framer — Site Settings → General → Custom Code → paste into End of
<body>tag. - Carrd — Site → Embed element → paste the snippet there, or use a Pro plan’s site-wide embed.
- Notion sites (Super, Potion, Feather) — each has a “custom code” or “footer scripts” setting in site settings.
- Wix — Wix has its own setup path. See Resolve247 for Wix for the integration walkthrough.
- WordPress — use our WordPress-specific guide.
Don’t see your platform listed?
If you’re on something else, search your platform’s settings for any of these labels — they all do the same thing:
- “Custom code”
- “Code injection”
- “Footer scripts” or “Footer code”
- “Custom HTML”
- “Header & footer” or “End of body”
- “Third-party scripts”
If your platform doesn’t expose any of these, get in touch and we’ll help you find the right place — or confirm whether your platform supports custom scripts at all.
Step 3: Paste the snippet
Wherever you ended up in Step 2, paste the snippet you copied so it appears immediately before the </body> tag (or in the “footer” / “end of body” code box, which is the platform equivalent).
...your existing page content...

<!-- Start chatbot Snippet-->
    <script type="text/javascript" src = "https://app.resolve247.ai/embed_widget/[your-unique-key]"></script>
<!-- End chatbot Snippet -->
</body>
</html>
Save the file or, on a hosted builder, Save and publish so the change goes live.
Step 4: Check it’s working
- Open your site in an incognito/private window (so you bypass any logged-in caches).
- Look for the Resolve247 chat bubble in the bottom-right corner.
- Click it, ask a test question, and check the response.
If the chat icon doesn’t appear (it’s in the bottom right of the screen by default):
- Hard-refresh the page (Ctrl/Cmd + Shift + R).
- Check that the snippet is inside
<body>...</body>and not, for example, inside<head>or stripped out by your platform’s sanitiser. - Open your browser’s developer tools (F12) → Console tab → look for any errors mentioning
resolve247. - Confirm you saved/published the change on your hosting platform.
Need a hand?
Installing a script is a small task, but every platform is slightly different. If yours doesn’t fit any of the scenarios above, or you’d rather we just do it for you, we’re happy to help.
Related guides
- How to add Resolve247 to a WordPress site — the WordPress-specific version of this guide, using a free plugin.
- How to add an AI chatbot to your website: 8 ways compared — if you’re still choosing between Resolve247 and other ways to add AI to your site.
- Resolve247 pricing — plan details and the 30-day free trial.